
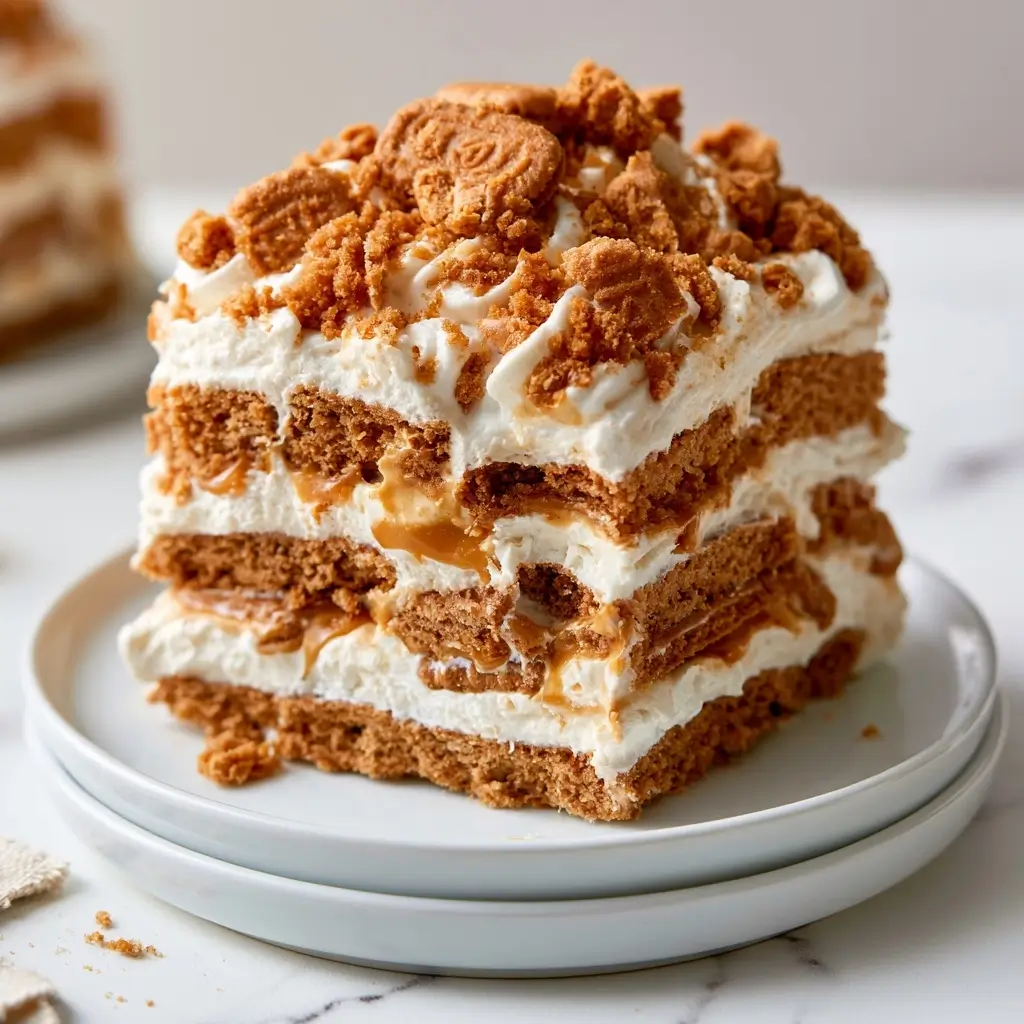
This Biscoff Icebox Cake is one of those no-fuss desserts that feels special with very little effort. Creamy layers, cookie crumbs, and that caramel-spiced Biscoff flavor come together into a chilled treat that slices beautifully.
Biscoff Icebox Cake
Ingredients
- 24 Biscoff cookies
- 2 cups heavy cream
- 16 oz cream cheese softened
- 1 cup powdered sugar
- 1 tsp alcohol-free vanilla
- 1 Tbsp milk as needed to loosen the filling
- cookie crumbs or crushed cookies optional, for garnish
Instructions
- Step 1: Make the fillingBeat the cream cheese until smooth, then add the powdered sugar and alcohol-free vanilla. In a separate bowl, whip the cream to soft peaks, then fold it into the cream cheese mixture until light and fluffy.
- Step 2: Build the first layerSpread a thin layer of filling in the bottom of your dish. Add a layer of Biscoff cookies over the top, breaking a few as needed so the whole surface is covered.
- Step 3: Continue layeringSpread more filling over the cookies, then repeat the cookie layer. Keep going until you use up the ingredients, finishing with a smooth layer of filling on top.
- Step 4: Chill the cakeCover and refrigerate the cake for at least 6 hours, or overnight if you can. This is what helps the cookies soften into that classic icebox cake texture.
- Step 5: Finish and serveBefore serving, garnish with crushed cookies or a drizzle of warmed cookie spread if you like. Slice carefully and serve chilled.
Notes
Why You’ll Love This Biscoff Icebox Cake
It is creamy, cool, and full of cozy cookie flavor. You do not need an oven, and the layers soften just enough in the fridge to become luscious and cake-like.
This is also a great make-ahead dessert. It gives you time to prep before guests arrive, and it tastes even better after resting overnight.
Biscoff Icebox Cake Ingredients & Substitutions
- Biscoff cookies, the star of the dessert and the base for the layers.
- Heavy cream, whipped until fluffy for a light filling.
- Cream cheese, softened, for body and a tangy richness.
- Powdered sugar, for sweetness without graininess.
- Alcohol-free vanilla, for a warm background flavor.
- Milk, just enough to loosen the filling if needed.
- Optional cookie crumbs or crushed cookies, for garnish.
If you want a slightly lighter filling, fold in a little extra whipped cream. You can also use another crisp caramel cookie if you cannot find Biscoff, though the flavor will be a little different.
Step-by-Step Instructions to Make Biscoff Icebox Cake
Step 1: Make the filling
Beat the cream cheese until smooth, then add the powdered sugar and alcohol-free vanilla. In a separate bowl, whip the cream to soft peaks, then fold it into the cream cheese mixture until light and fluffy.
Step 2: Build the first layer
Spread a thin layer of filling in the bottom of your dish. Add a layer of Biscoff cookies over the top, breaking a few as needed so the whole surface is covered.
Step 3: Continue layering
Spread more filling over the cookies, then repeat the cookie layer. Keep going until you use up the ingredients, finishing with a smooth layer of filling on top.
Step 4: Chill the cake
Cover and refrigerate the cake for at least 6 hours, or overnight if you can. This is what helps the cookies soften into that classic icebox cake texture.
Step 5: Finish and serve
Before serving, garnish with crushed cookies or a drizzle of warmed cookie spread if you like. Slice carefully and serve chilled.
Tips for Success
Use softened cream cheese so the filling blends smoothly. If it is too cold, you may end up with lumps.
Do not overwhip the cream. Soft peaks are best because they keep the filling airy and easy to spread.
Let the cake chill long enough for the cookies to soften. A quick chill will not give you the best texture.
Variations of Biscoff Icebox Cake
Add a layer of sliced bananas for a fruity twist. You could also fold a little cinnamon into the filling for extra warmth.
For a richer version, drizzle melted cookie spread between the layers. If you like texture, add chopped toasted nuts on top just before serving.
Serving Suggestions: What to Pair with Biscoff Icebox Cake
Serve this dessert after a simple family dinner or alongside fresh berries. A cup of coffee, chai, or black tea works especially well with the caramel spice flavors.
If you are serving a crowd, pair it with a fruit platter so the meal feels balanced and fresh.
Storage & Reheating Instructions
Store leftovers covered in the refrigerator for up to 4 days. The texture will continue to soften, which makes it even more spoonable over time.
This dessert is best served cold, so there is no reheating needed. If you want cleaner slices, chill it for 20 to 30 minutes before cutting.
Memories Made Around the Table
There is something lovely about desserts that invite everyone back for one more small slice. This is the kind of recipe I love bringing to a gathering, because it feels nostalgic, generous, and easy to share.
FAQs
Can I make Biscoff Icebox Cake ahead of time?
Yes, and it is actually better that way. Overnight chilling gives the cookies time to soften and the flavors to meld.
Can I use a different cookie?
You can use another crisp spiced or caramel cookie, but the flavor will change a bit. The signature taste comes from Biscoff cookies.
How do I keep the filling from getting runny?
Make sure the cream cheese is soft but not warm, and whip the cream to soft peaks. Chilling the finished cake also helps it set properly.
Can I freeze this dessert?
Yes, you can freeze it for a firmer, almost semifreddo-style texture. Wrap it well and thaw briefly in the refrigerator before serving.
Final Thoughts
This Biscoff Icebox Cake is simple, comforting, and always a crowd-pleaser. If you love creamy desserts with cozy cookie flavor, this one is worth keeping in your regular rotation.