
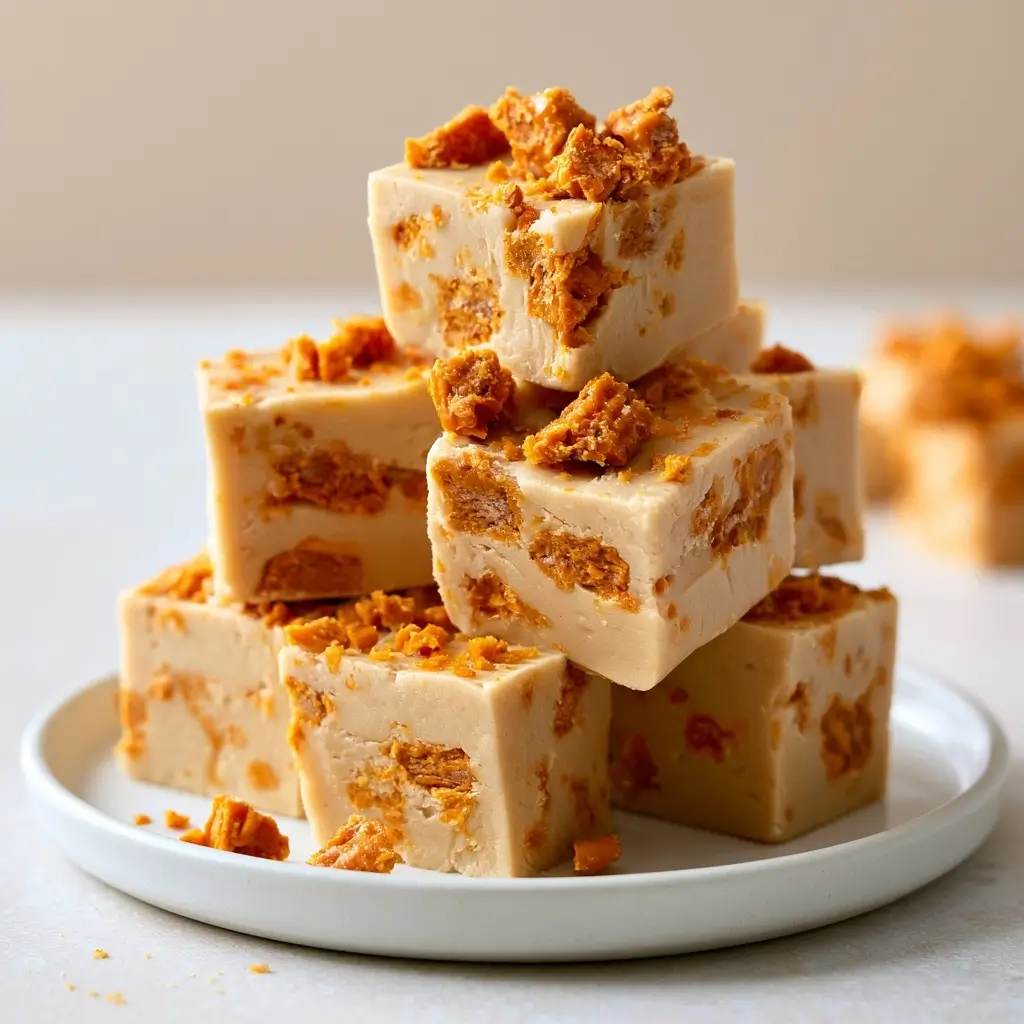
Butterfinger Fudge is the kind of sweet treat that disappears fast at parties, holiday trays, and after-dinner snack time. It has that classic peanut butter and chocolate flavor everyone recognizes, with a creamy texture that makes each bite feel extra special.
Butterfinger Fudge
Equipment
- 1 8x8 inch baking pan lined with parchment paper
- 1 Medium saucepan
- 1 Spatula
Ingredients
Fudge
- 1 cup butter
- 1 can sweetened condensed milk 14-ounce
- 2 cups chocolate chips semi-sweet or milk chocolate
- 1 cup peanut butter creamy
- 1 teaspoon alcohol-free vanilla
- 1 pinch salt optional
Topping
- 1 cup Butterfinger candy crushed
Instructions
- Line an 8x8-inch baking pan with parchment paper, leaving a little overhang on the sides so the fudge lifts out easily later.
- In a medium saucepan over low heat, melt the butter with the sweetened condensed milk. Stir gently until the mixture looks smooth and glossy.
- Stir in the chocolate chips and peanut butter. Keep mixing until everything is fully melted and the mixture is thick and creamy.
- Remove the pan from the heat, then stir in the alcohol-free vanilla. The mixture should be smooth and spreadable.
- Pour the fudge into the prepared pan and spread it evenly with a spatula.
- Sprinkle the crushed Butterfinger candy over the top, pressing lightly so it sticks. Chill the fudge until firm, then lift it out and cut into squares.
Notes
Why You’ll Love This Butterfinger Fudge
This fudge is rich, smooth, and packed with peanut butter flavor. It comes together with simple pantry ingredients, and the crushed candy topping gives it a fun crunch that makes every square feel a little nostalgic.
Butterfinger Fudge Ingredients & Substitutions
- Butter, for a creamy base
- Sweetened condensed milk, for sweetness and smooth texture
- Chocolate chips, semi-sweet or milk chocolate both work well
- Peanut butter, creamy is best for a silky fudge
- Alcohol-free vanilla, for a warm background flavor
- Crushed Butterfinger candy, for the signature topping
If you want a little extra saltiness, add a small pinch of salt to the fudge mixture. You can also swap milk chocolate for semi-sweet chocolate if you prefer a sweeter finish.
Step-by-Step Instructions to Make Butterfinger Fudge
Step 1: Prepare the pan
Line an 8×8-inch baking pan with parchment paper, leaving a little overhang on the sides so the fudge lifts out easily later.
Step 2: Melt the base
In a medium saucepan over low heat, melt the butter with the sweetened condensed milk. Stir gently until the mixture looks smooth and glossy.
Step 3: Add the chocolate and peanut butter
Stir in the chocolate chips and peanut butter. Keep mixing until everything is fully melted and the mixture is thick and creamy.
Step 4: Finish the flavor
Remove the pan from the heat, then stir in the alcohol-free vanilla. The mixture should be smooth and spreadable.
Step 5: Add to the pan
Pour the fudge into the prepared pan and spread it evenly with a spatula.
Step 6: Top and chill
Sprinkle the crushed Butterfinger candy over the top, pressing lightly so it sticks. Chill the fudge until firm, then lift it out and cut into squares.
Tips for Success
Keep the heat low so the chocolate does not scorch. Stir often for the smoothest texture, and wait until the fudge is fully set before slicing. A sharp knife warmed under hot water can help make cleaner cuts.
Variations of Butterfinger Fudge
Try using dark chocolate for a deeper flavor, or add chopped peanuts for more crunch. You can also swirl in a little peanut butter on top before chilling for a pretty finish.
Serving Suggestions: What to Pair with Butterfinger Fudge
Serve this fudge with coffee, cold milk, or a simple fruit platter to balance the sweetness. It also makes a lovely addition to dessert boards, cookie trays, and gift boxes.
Storage & Reheating Instructions
Store the fudge in an airtight container in the refrigerator for up to 1 week. For longer storage, freeze the squares in a sealed container with parchment between layers for up to 2 months. Let frozen fudge sit at room temperature for a few minutes before serving.
Memories Made Around the Table
This is the kind of recipe that often brings people back for just one more piece. I love making treats like this when I want something simple, cheerful, and easy to share with the people I care about.
FAQs
Can I make Butterfinger Fudge ahead of time?
Yes, this fudge is a great make-ahead dessert. It actually slices better after chilling for several hours or overnight.
Do I need a candy thermometer?
No, this recipe does not require a candy thermometer. It is a simple stovetop fudge that comes together by melting and stirring.
Can I use a different candy topping?
Yes, you can swap the crushed candy topping for chopped peanuts, crushed peanut butter cups, or chocolate cookie crumbs.
Why is my fudge too soft?
If the fudge seems soft, it may need more chilling time. Make sure it is fully cold before cutting, and store it in the refrigerator for the best texture.
Final Thoughts
Butterfinger Fudge is a fun, easy dessert that delivers big flavor with very little fuss. If you love creamy chocolate peanut butter treats, this one is worth making again and again.