

Christmas is my favorite time of year because I get to bake vibrant treats for the whole family. I love how the deep red color of this cheesecake pops against a white table setting, making it the perfect centerpiece for our festive dinner. Every time I bring this out, my guests are amazed by the contrast between the dark crust and the silky, scarlet filling.
Recipe Details
Recipe Information
- Prep Time: 30 minutes
- Cook Time: 60 minutes
- Total Time: 90 minutes
- Servings: 12
- Difficulty: Medium
Nutrition Information (Per Serving)
- Calories: 450 kcal
- Protein: 6g
- Carbs: 42g
- Fat: 28g
Why You’ll Love This Dessert
This dessert is the ultimate holiday treat because it balances the tangy richness of cream cheese with the subtle chocolate notes of red velvet. The Oreo crust adds a satisfying crunch and a deep cocoa flavor that complements the smooth filling perfectly. It is a visually stunning dish that looks like it came from a high-end bakery, yet it is simple enough to make in your own kitchen during the busy holiday season.
This Dessert Ingredients & Substitutions
- 24 Oreo cookies, finely crushed
- 4 tablespoons butter, melted
- 24 ounces cream cheese, softened to room temperature
- 1 cup granulated sugar
- 3 large eggs, room temperature
- 1/2 cup sour cream
- 2 tablespoons unsweetened cocoa powder
- 1 teaspoon alcohol-free vanilla extract
- 1 teaspoon lemon juice
- 1 tablespoon red gel food coloring
- Whipped cream and chocolate shavings for garnish
If you do not have Oreo cookies, you can use any chocolate sandwich cookie or even a standard chocolate graham cracker crust. For the sour cream, full-fat Greek yogurt works as a great alternative to maintain that signature tang. If you prefer a more natural coloring, you can use beet powder, though the red hue may be slightly more muted than with gel coloring.
Step-by-Step Instructions to Make This Dessert
Step 1: Prepare the Oven and Crust
Preheat your oven to 350 degrees Fahrenheit and grease a 9-inch springform pan. In a medium bowl, combine the crushed Oreo cookies and melted butter until the mixture resembles wet sand. Press the mixture firmly into the bottom of the prepared pan and bake for 8 to 10 minutes, then remove from the oven and let it cool while you prepare the filling.
Step 2: Cream the Base Filling
In a large mixing bowl, beat the softened cream cheese and granulated sugar together until the mixture is completely smooth and fluffy. It is important to use room temperature cream cheese to avoid any lumps. Lower the mixer speed and add the eggs one at a time, mixing just until combined after each addition to avoid adding too much air to the batter.
Step 3: Add Flavor and Festive Color
Stir in the sour cream, unsweetened cocoa powder, alcohol-free vanilla extract, and lemon juice until well incorporated. Finally, add the red gel food coloring and mix until the batter reaches a vibrant, uniform red color. Using gel coloring is recommended as it provides a deeper hue without changing the consistency of the batter.
Step 4: Bake the Cheesecake
Pour the red velvet filling over the cooled Oreo crust and smooth the top with a spatula. Reduce the oven temperature to 325 degrees Fahrenheit. Place the pan in the oven and bake for 50 to 60 minutes, or until the edges are set but the center still has a slight jiggle. For the best results, place a pan of water on the bottom rack to create steam while baking.
Step 5: Cool and Chill
Turn off the oven and crack the door open, allowing the cheesecake to cool slowly inside for about an hour. This helps prevent cracks from forming on the surface. Once cooled to room temperature, wrap the pan in plastic wrap and refrigerate for at least 6 hours, or preferably overnight, to allow the flavors to develop and the texture to firm up.
Tips for Success
To ensure your cheesecake is perfectly smooth, always use room temperature ingredients, especially the cream cheese and eggs. When mixing the batter, try not to overbeat it once the eggs are added, as this can incorporate air bubbles that cause the cake to crack or puff up and then sink. If you want a truly professional look, use a warm knife to slice the cake, wiping it clean between every single cut for those sharp, clean edges.
Variations of This Dessert
You can easily customize this recipe for different holiday preferences. For a minty twist, add a half teaspoon of peppermint extract to the batter and top with crushed candy canes. If you love white chocolate, drizzle melted white chocolate over the top once the cake has chilled. You can also make mini versions by using a muffin tin with liners, reducing the bake time to about 20 minutes.
Serving Suggestions: What to Pair with This Dessert
This rich dessert pairs wonderfully with a cup of hot dark roast coffee or a steaming mug of cocoa. If you want to lean into the festive theme, serve it alongside a bowl of fresh raspberries or a tart cranberry compote to cut through the creaminess. A simple dollop of homemade whipped cream on each slice adds a light, airy contrast to the dense cheesecake.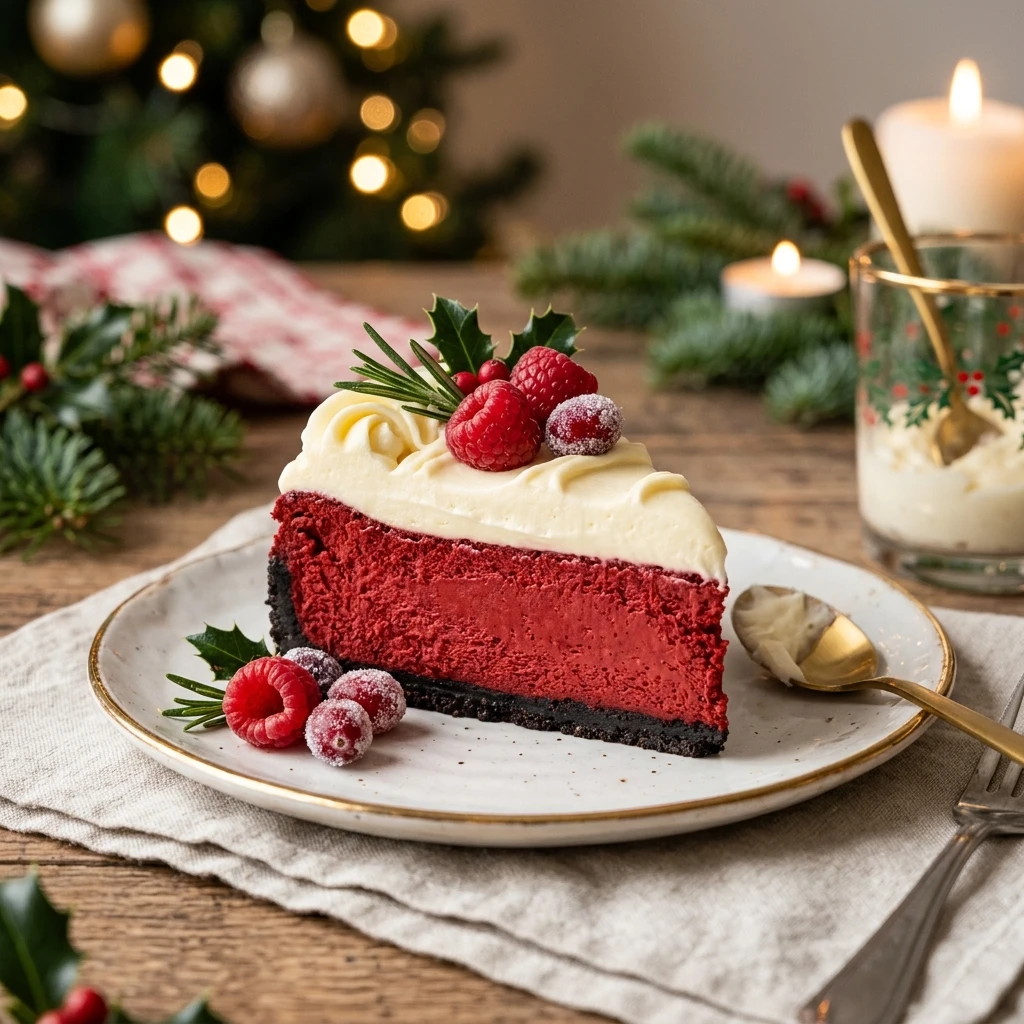
Storage & Reheating Instructions
Store any leftovers in an airtight container in the refrigerator for up to 5 days. This cheesecake also freezes beautifully. Wrap individual slices or the whole cake tightly in plastic wrap and then aluminum foil, and it will stay fresh in the freezer for up to 2 months. Thaw in the refrigerator overnight before serving. Do not reheat the cheesecake, as it is meant to be enjoyed cold.
Memories Made Around the Table
I remember my grandmother always making a classic red velvet cake for Christmas Eve dinner, and the smell of cocoa and sugar would fill the whole house. I wanted to capture those childhood memories but add a modern twist with the creamy texture of a cheesecake. Now, this has become the recipe my own children ask for every year, and we love decorating the top together with festive sprinkles and cream.
FAQs
How do I prevent my cheesecake from cracking?
Cracking usually happens due to sudden temperature changes or overmixing. To prevent this, use room temperature ingredients, avoid overbeating the eggs, and let the cheesecake cool slowly in the oven with the door cracked before moving it to the counter.
Can I use liquid food coloring instead of gel?
You can use liquid coloring, but you will likely need to use a larger amount to achieve the same vibrant red. Be careful, as adding too much liquid can slightly alter the consistency of the cheesecake batter.
Do I really need a water bath?
While not strictly mandatory, a water bath provides a moist environment that helps the cheesecake bake evenly and prevents the top from drying out or cracking. If you skip it, just be sure to monitor the oven temperature closely.
How long does the cheesecake need to chill?
For the best texture and flavor, you should chill the cheesecake for at least 6 to 8 hours. Chilling it overnight is even better, as it allows the structure to fully set and the cocoa flavors to intensify.
Can I make the Oreo crust in advance?
Yes, you can prepare the crust a day ahead of time. Simply press it into the pan and keep it in the refrigerator until you are ready to add the filling and bake. You can even bake the crust ahead of time and let it sit at room temperature.
Final Thoughts
This Christmas Red Velvet Cheesecake with Oreo Crust is a decadent, beautiful, and delicious way to celebrate the holiday season. Its striking colors and rich flavors make it a memorable treat that your family and friends will talk about long after the decorations are put away. I hope this recipe brings as much joy to your holiday table as it does to mine.


Christmas Red Velvet Cheesecake with Oreo Crust
- Total Time: 1 hour 30 minutes
Ingredients
- 24 Oreo cookies, finely crushed
- 4 tablespoons butter, melted
- 24 ounces cream cheese, softened to room temperature
- 1 cup granulated sugar
- 3 large eggs, room temperature
- 1/2 cup sour cream
- 2 tablespoons unsweetened cocoa powder
- 1 teaspoon alcohol-free vanilla extract
- 1 teaspoon lemon juice
- 1 tablespoon red gel food coloring
- Whipped cream and chocolate shavings for garnish
Instructions
- Preheat your oven to 350 degrees Fahrenheit and grease a 9-inch springform pan. In a medium bowl, combine the crushed Oreo cookies and melted butter until the mixture resembles wet sand. Press the mixture firmly into the bottom of the prepared pan and bake for 8 to 10 minutes, then remove from the oven and let it cool while you prepare the filling.
- In a large mixing bowl, beat the softened cream cheese and granulated sugar together until the mixture is completely smooth and fluffy. It is important to use room temperature cream cheese to avoid any lumps. Lower the mixer speed and add the eggs one at a time, mixing just until combined after each addition to avoid adding too much air to the batter.
- Stir in the sour cream, unsweetened cocoa powder, alcohol-free vanilla extract, and lemon juice until well incorporated. Finally, add the red gel food coloring and mix until the batter reaches a vibrant, uniform red color. Using gel coloring is recommended as it provides a deeper hue without changing the consistency of the batter.
- Pour the red velvet filling over the cooled Oreo crust and some the top with a spatula. Reduce the oven temperature to 325 degrees Fahrenheit. Place the pan in the oven and bake for 50 to 60 minutes, or until the edges are set but the center still has a slight jiggle. For the best results, place a pan of water on the bottom rack to create steam while baking.
- Turn off the oven and crack the door open, allowing the cheesecake to cool slowly inside for about an hour. This helps prevent cracks from forming on the surface. Once cooled to room temperature, wrap the pan in plastic wrap and refrigerate for at least 6 hours, or preferably overnight, to allow the flavors to develop and the texture to firm up.
- Cook Time: 90 minutes
- Diet: Vegetarian