
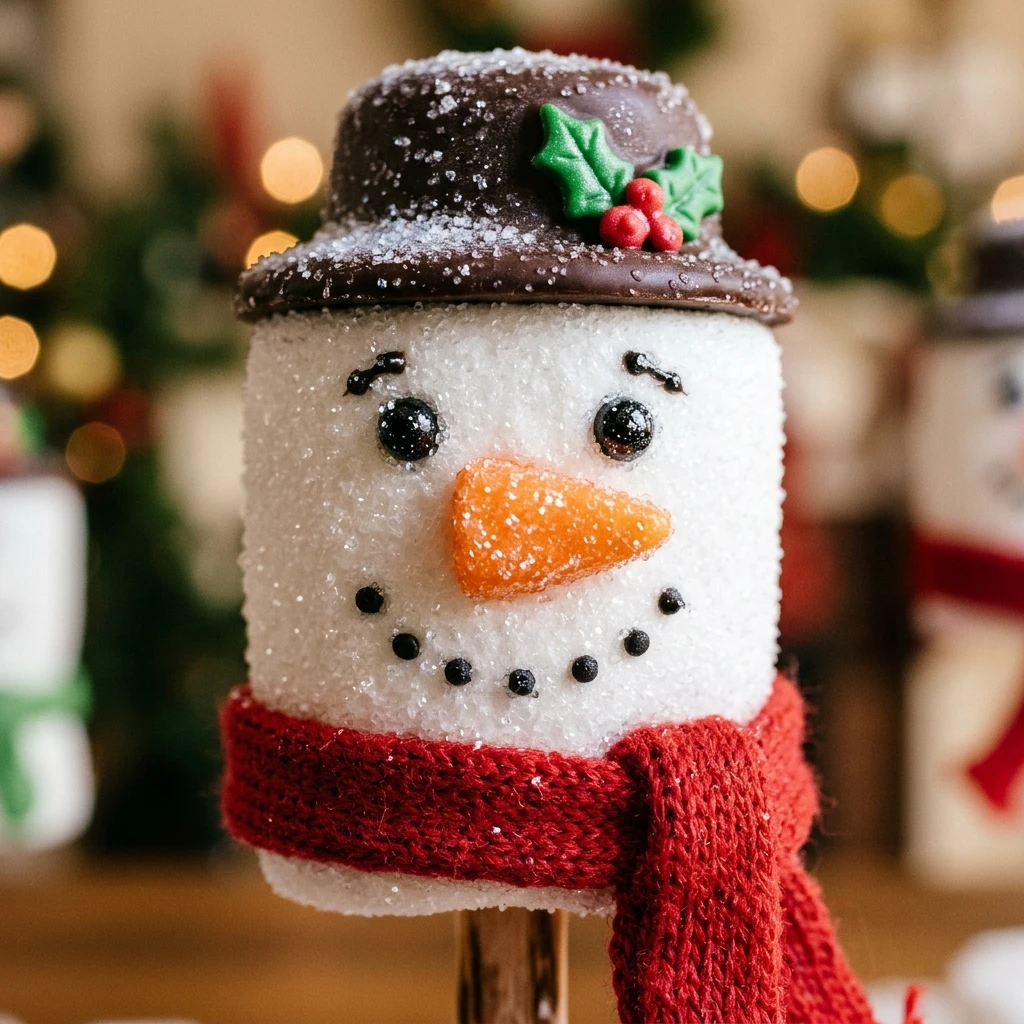
Every year when the first snowflake falls, I find myself reaching for the sprinkles and marshmallows to create something magical. These Frosty the Snowman Marshmallow Pops are one of my favorite holiday traditions because they bring a huge smile to everyone’s face. I love how simple they are to assemble, making them the perfect festive activity for a cozy afternoon indoors during the Christmas season.
Recipe Details
Recipe Information
- Prep Time: 30 minutes
- Cook Time: 5 minutes
- Total Time: 35 minutes
- Servings: 12 pops
- Difficulty: Easy
Nutrition Information (Per Serving)
- Calories: 180 kcal
- Protein: 1g
- Carbs: 28g
- Fat: 7g
Why You’ll Love Frosty the Snowman Marshmallow Pops
There is something incredibly charming about a treat that looks like it belongs in a winter wonderland. These pops are fantastic because they require zero baking, which is a lifesaver during the busy Christmas rush. You will love how customizable they are, allowing you to give each snowman its own little personality. They are also the perfect size for little hands, making them a hit at school parties or family gatherings. Plus, the combination of fluffy marshmallows and smooth white chocolate is a classic crowd pleaser that never goes out of style.
Frosty the Snowman Marshmallow Pops Ingredients & Substitutions
- 24 large marshmallows (plant based or fish based gelatin)
- 12 ounces white chocolate melting wafers or white candy coating
- 12 paper straws or lollipop sticks
- 24 mini chocolate chips for the eyes
- 12 orange sunflower seeds or orange sprinkles for the nose
- 60 mini chocolate chips or black edible ink for the mouth
- 12 chocolate sandwich cookies for the hat base
- 12 small chocolate nut butter cups for the top of the hat
- 1 teaspoon coconut oil for thinning the chocolate
- 1/2 teaspoon alcohol-free vanilla extract for flavoring
If you prefer a different flavor, you can use milk chocolate for the coating, though your snowman will look a bit more like a gingerbread man. For those who cannot find the specific hat ingredients, large gumdrops or even a peppermint patty can serve as a festive alternative. You may also swap the paper straws for pretzel rods to make the entire treat edible from top to bottom. If the white chocolate is too thick, adding a tiny bit more coconut oil will help create a smoother finish for dipping.
Step-by-Step Instructions to Make Frosty the Snowman Marshmallow Pops
Step 1: Prepare the Marshmallow Base
Skewer two large marshmallows onto each paper straw or lollipop stick. Make sure the stick goes through the center but does not poke out of the top marshmallow. This creates the body and head of your snowman. Arrange them on a parchment lined baking sheet so they are ready for dipping.
Step 2: Melt the White Chocolate
Place your white chocolate wafers and coconut oil in a microwave safe bowl. Heat in 30 second intervals, stirring well between each session, until the chocolate is completely smooth and glossy. Stir in the alcohol-free vanilla extract if you are using it for extra aroma and flavor. Be careful not to overheat the chocolate, as white chocolate can burn easily.
Step 3: Dip the Snowmen
Hold the straw and dip the marshmallows into the melted chocolate. Use a spoon to help coat the sides if needed. Gently tap the straw against the side of the bowl to let the excess chocolate drip off. This ensures a smooth, even coat without big clumps at the bottom.
Step 4: Create the Face and Buttons
While the chocolate is still wet, carefully place two mini chocolate chips for the eyes and an orange sprinkle or seed for the nose. Use more mini chocolate chips to create a little dotted smile. If the chocolate sets too quickly, you can use a toothpick to dab a tiny bit of wet chocolate onto the back of your decorations to act as glue.
Step 5: Assemble the Hats
Take a chocolate sandwich cookie and separate the halves, removing the cream. Place one cookie half on top of the snowman head while the chocolate is still tacky. Dip the bottom of a small chocolate cup into the melted white chocolate and press it onto the center of the cookie. This creates the classic top hat look for Frosty.
Step 6: Set and Chill
Place the finished pops back onto the parchment paper or stand them up in a heavy glass or foam block. Let them sit at room temperature for about 20 minutes until the chocolate is firm. If your kitchen is warm, you can pop them in the refrigerator for 5 to 10 minutes to speed up the process.
Tips for Success
To get the smoothest finish, make sure your marshmallows are at room temperature before dipping. If they are cold, the chocolate might set too fast and look lumpy. Always use a deep, narrow bowl for melting the chocolate so you can submerge the marshmallows fully with ease. If you find the marshmallows are sliding down the straw, dip the tip of the straw in a little melted chocolate before skewering the marshmallows. This acts as a bond to keep everything in place while you work.
Variations of Frosty the Snowman Marshmallow Pops
For a fun twist, you can wrap a small piece of sour candy tape around the snowman’s neck to act as a colorful scarf. If you want a sparkling look, dust the wet white chocolate with edible clear glitter or sanding sugar to mimic glistening snow. You can also make a melted snowman version by placing a single decorated marshmallow on a puddle of melted white chocolate on a cookie. Another great idea is to use different colored candy melts to give your snowmen colorful hats or even little earmuffs made from mini marshmallows and a piece of licorice.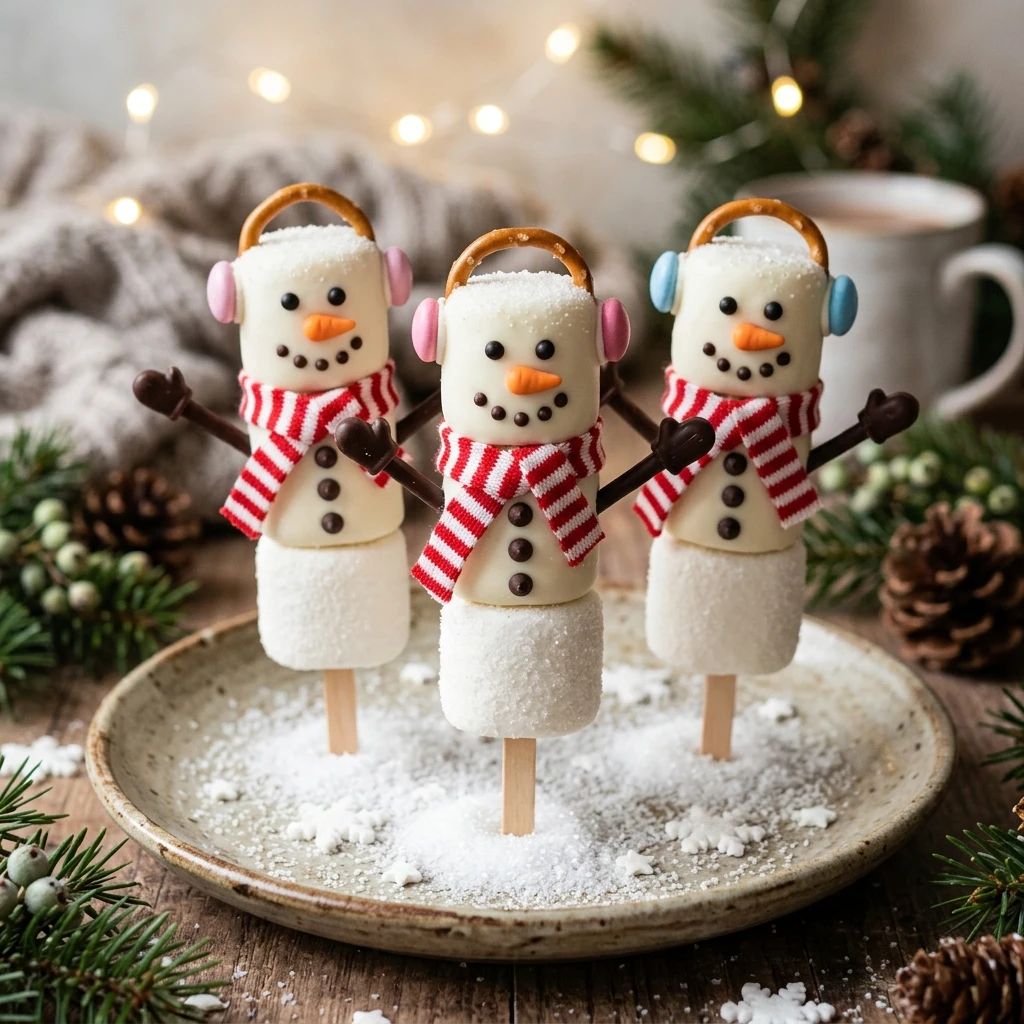
Serving Suggestions: What to Pair with Frosty the Snowman Marshmallow Pops
These pops are the ultimate companion for a steaming mug of hot cocoa topped with whipped cream. They also look beautiful served on a platter alongside peppermint bark, gingerbread cookies, and sugar cookies for a complete Christmas dessert board. If you are hosting a holiday party, consider placing them in a tall glass filled with white sugar to look like they are standing in a snowbank. They also make wonderful party favors when wrapped in individual cellophane bags and tied with a festive red ribbon.
Storage & Reheating Instructions
Store these treats in an airtight container in a cool, dry place for up to one week. You do not need to refrigerate them unless your home is particularly warm, as the chocolate may bloom or the marshmallows might get slightly tough in the fridge. Avoid freezing these pops, as the marshmallows can change texture and the chocolate might crack upon thawing. Since these are a cold confection, no reheating is required. Just serve them at room temperature for the best flavor and texture.
Memories Made Around the Table
I remember one specific Christmas Eve when the power went out during a light snowstorm. We lit some candles and finished decorating a batch of these pops by the soft glow of the fireplace. It turned into such a peaceful and joyful moment, focusing entirely on the tiny chocolate chip smiles we were creating. My children still talk about that night every time we bring out the marshmallows. It reminded me that the simplest treats often hold the most precious memories, especially when shared with the people you love.
FAQs
Can I make these marshmallow pops a few days in advance?
Yes, you can certainly make these a few days ahead of your event. Just ensure they are stored in a cool environment and kept in an airtight container to keep the marshmallows soft. They stay fresh and look great for about 5 to 7 days.
What if I cannot find orange sunflower seeds for the nose?
You can use a variety of alternatives for the nose. Orange tic-tacs, orange gummy bits, or even a small triangle cut from an orange fruit leather work beautifully. You can also tint a tiny bit of white chocolate with orange food coloring and pipe the nose on once the white coating has set.
How do I keep the sticks from falling out of the marshmallows?
The best trick is to dip about half an inch of the stick into the melted chocolate before inserting it into the marshmallows. The chocolate will harden inside the marshmallow and act like a glue, providing much more stability for dipping and serving.
Can I use white chocolate chips instead of melting wafers?
White chocolate chips can be used, but they often contain stabilizers that make them harder to melt smoothly. If you use chips, you will definitely need to add a teaspoon or two of coconut oil or vegetable shortening to help achieve a dipping consistency.
Are these pops suitable for a outdoor winter party?
As long as the temperature is cool, they will hold up perfectly. However, if it is raining or very humid, the marshmallows can become sticky and the chocolate might lose its snap. Keeping them covered until serving is usually the best approach for outdoor events.
Final Thoughts
Creating Frosty the Snowman Marshmallow Pops is a delightful way to celebrate the magic of the Christmas season. They are simple, sweet, and bring a touch of whimsy to any holiday spread. Whether you are making them with your kids or preparing them as a gift for neighbors, the process is just as enjoyable as the treat itself. I hope these little snowmen bring as much joy to your home as they do to mine. Happy holidays and happy decorating!
Frosty the Snowman Marshmallow Pops
- Total Time: 35 minutes
Ingredients
- 24 large marshmallows (plant based or fish based gelatin)
- 12 ounces white chocolate melting wafers or white candy coating
- 12 paper straws or lollipop sticks
- 24 mini chocolate chips for the eyes
- 12 orange sunflower seeds or orange sprinkles for the nose
- 60 mini chocolate chips or black edible ink for the mouth
- 12 chocolate sandwich cookies for the hat base
- 12 small chocolate nut butter cups for the top of the hat
- 1 teaspoon coconut oil for thinning the chocolate
- 1/2 teaspoon alcohol-free vanilla extract for flavoring
Instructions
- Step 1: Prepare the Marshmallow Base: Skewer two large marshmallows onto each paper straw or lollipop stick. Make sure the stick goes through the center but does not poke out of the top marshmallow. This creates the body and head of your snowman. Arrange them on a parchment lined baking sheet so they are ready for dipping.
- Step 2: Melt the White Chocolate: Place your white chocolate wafers and coconut oil in a microwave safe bowl. Heat in 30 second intervals, stirring well between each session, until the chocolate is completely smooth and glossy. Stir in the alcohol-free vanilla extract if you are using it for extra aroma and flavor. Be careful not to overheat the chocolate, as white chocolate can burn easily.
- Step 3: Dip the Snowmen: Hold the straw and dip the marshmallows into the melted chocolate. Use a spoon to help coat the sides if needed. Gently tap the straw against the side of the bowl to let the excess chocolate drip off. This ensures a smooth, even coat without big clumps at the bottom.
- Step 4: Create the Face and Buttons: While the chocolate is still wet, carefully place two mini chocolate chips for the eyes and an orange sprinkle or seed for the nose. Use more mini chocolate chips to create a little dotted smile. If the chocolate sets too quickly, you can use a toothpick to dab a tiny bit of wet chocolate onto the back of your decorations to act as glue.
- Step 5: Assemble the Hats: Take a chocolate sandwich cookie and separate the halves, removing the cream. Place one cookie half on top of the snowman head while the chocolate is still tacky. Dip the bottom of a small chocolate cup into the melted white chocolate and press it onto the center of the cookie. This creates the classic top hat look for Frosty.
- Step 6: Set and Chill: Place the finished pops back onto the parchment paper or stand them up in a heavy glass or foam block. Let them sit at room temperature for about 20 minutes until the chocolate is firm. If your kitchen is warm, you can pop them in the refrigerator for 5 to 10 minutes to speed up the process.
- Cook Time: 35 minutes
- Diet: Vegetarian