

Mint Chocolate Kiss Blossom Cookies
Every year when the holiday lights start to twinkle, I find myself reaching for my favorite mixing bowl to start the Christmas baking season. These Mint Chocolate Kiss Blossom Cookies have become a cherished tradition in my home because they look like little festive ornaments and taste like a winter wonderland. I love how the rich chocolate base perfectly complements the cool mint swirl, making every bite feel like a celebration of the season.
Recipe Details
Recipe Information
- Prep Time: 20 minutes
- Cook Time: 10 minutes
- Total Time: 30 minutes
- Servings: 24 cookies
- Difficulty: Easy
Nutrition Information (Per Serving)
- Calories: 155
- Protein: 2g
- Carbs: 19g
- Fat: 8g
Why You’ll Love This Mint Chocolate Kiss Blossom Cookies
This recipe is a holiday standout because it offers a sophisticated twist on the classic peanut butter blossom. The deep cocoa flavor of the cookie provides a decadent foundation for the refreshing peppermint swirl on top. They are incredibly easy to assemble, which makes them perfect for busy Christmas parties or as a fun activity to do with family. Plus, the bright green sugar coating adds a sparkly, festive touch that looks stunning on any dessert platter.
Mint Chocolate Kiss Blossom Cookies Ingredients & Substitutions
- 1/2 cup unsalted butter, softened
- 3/4 cup granulated sugar
- 1 large egg
- 1 teaspoon alcohol-free vanilla extract
- 1/2 teaspoon peppermint extract
- 1 1/2 cups all-purpose flour
- 1/3 cup unsweetened cocoa powder
- 1/2 teaspoon baking soda
- 1/4 teaspoon salt
- 1/3 cup green sanding sugar, for rolling
- 24 mint chocolate swirl candy kisses, unwrapped
If you prefer a deeper chocolate flavor, you can use dark cocoa powder instead of the standard unsweetened version. For those who want a different texture, replacing the granulated sugar with light brown sugar will result in a chewier cookie. If green sanding sugar is unavailable, you can use regular white granulated sugar or even crushed candy canes for an extra crunch. Always ensure your butter is at room temperature to achieve a smooth dough consistency, and if you find the dough too soft, chilling it for fifteen minutes before rolling can help.
Step-by-Step Instructions to Make Mint Chocolate Kiss Blossom Cookies
Step 1: Preparation and Preheating
Start by preheating your oven to 350 degrees Fahrenheit. Line two large baking sheets with parchment paper or silicone mats to prevent the cookies from sticking. This ensures an even bake and makes cleanup much easier after your holiday baking session.
Step 2: Cream the Butter and Sugar
In a large mixing bowl, beat the softened butter and granulated sugar together until the mixture is light and fluffy. This process usually takes about two to three minutes using an electric mixer. Creaming these ingredients properly is the key to a soft, melt in your mouth cookie texture.
Step 3: Add Wet Ingredients
Beat in the egg, the alcohol-free vanilla extract, and the peppermint extract. Continue mixing until everything is well combined. The peppermint extract is quite strong, so measure carefully to ensure it does not overpower the chocolate.
Step 4: Combine Dry Ingredients
In a separate medium bowl, whisk together the all-purpose flour, cocoa powder, baking soda, and salt. Make sure there are no large clumps of cocoa powder, as this will ensure the flavor is evenly distributed throughout the dough.
Step 5: Form the Cookie Dough
Gradually add the dry ingredients to the wet ingredients. Mix on low speed until the flour and cocoa are just incorporated. Be careful not to overmix the dough, as this can lead to a tougher cookie. The dough should be thick and slightly tacky.
Step 6: Roll and Coat the Cookies
Scoop about one tablespoon of dough at a time and roll it into a ball, roughly one inch in diameter. Roll each ball in the green sanding sugar until it is completely coated. Place the balls on the prepared baking sheets, spacing them about two inches apart to allow for slight spreading.
Step 7: Bake the Cookies
Bake the cookies for 8 to 10 minutes. You will know they are done when the edges are set and the tops have a slightly cracked appearance. Do not overbake them, as they will continue to firm up as they cool on the hot pan.
Step 8: Add the Chocolate Kisses
Immediately after removing the cookies from the oven, gently press a mint chocolate swirl kiss into the center of each cookie. The heat from the cookie will slightly melt the bottom of the candy, helping it stick. Let the cookies sit on the baking sheet for five minutes before moving them to a wire rack to cool completely.
Tips for Success
For the best results, place your unwrapped chocolate kisses in the freezer for about twenty minutes before you start baking. This helps the candy hold its shape when you press it into the hot cookie. When rolling the dough, try to keep the balls uniform in size so they all bake at the same rate. If your kitchen is particularly warm, you may want to keep the dough in the refrigerator between batches to prevent the cookies from spreading too much in the oven.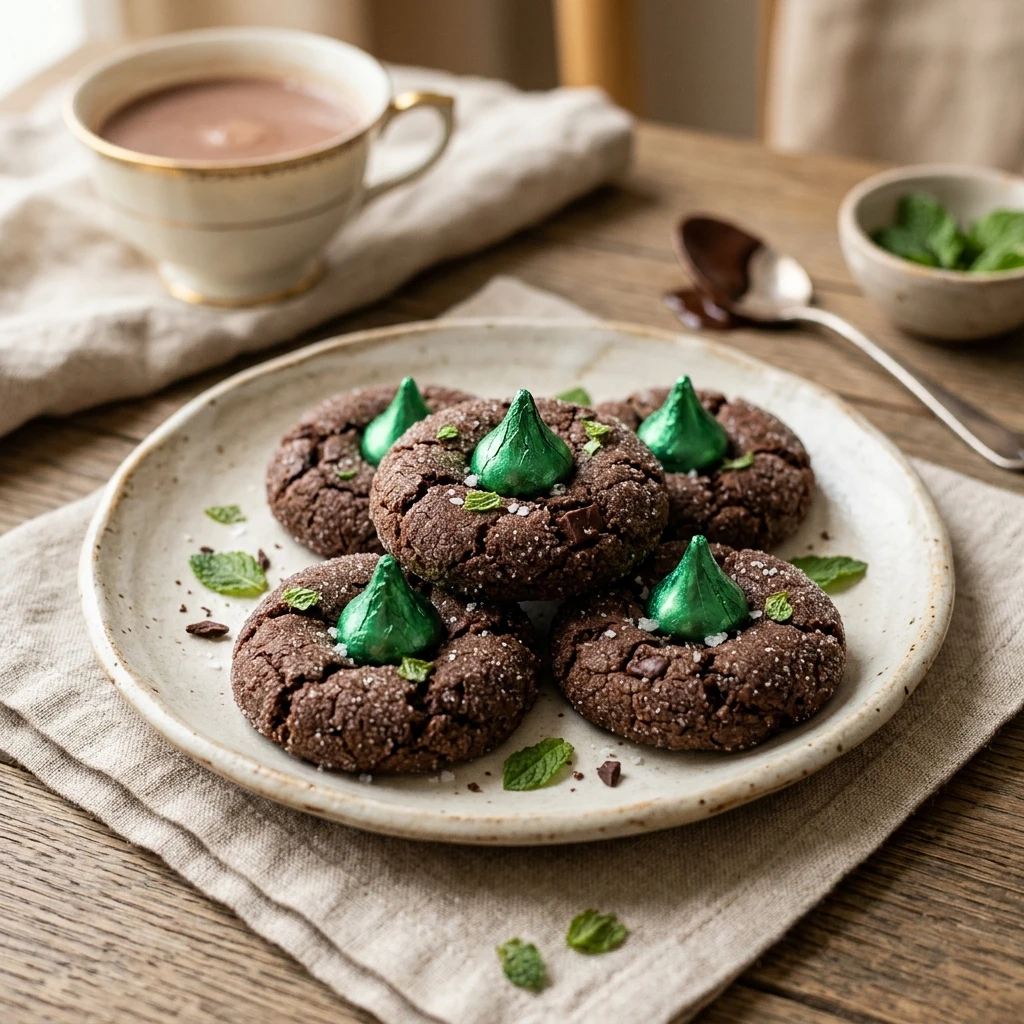
Variations of Mint Chocolate Kiss Blossom Cookies
You can easily customize these cookies to suit your holiday theme. For a chocolate orange version, swap the peppermint extract for orange extract and use a standard chocolate kiss. If you enjoy a bit of extra crunch, try rolling the dough balls in chopped nuts or nonpareils instead of sanding sugar. For a double mint experience, you can even add a handful of mini mint chocolate chips directly into the dough before baking.
Serving Suggestions: What to Pair with Mint Chocolate Kiss Blossom Cookies
These cookies are wonderful when served alongside a steaming mug of hot cocoa topped with whipped cream. They also make a lovely addition to a Christmas tea service, pairing beautifully with herbal peppermint tea or a rich black tea. For a fun dessert display, arrange them on a platter with white chocolate dipped pretzels and fresh strawberries to create a beautiful contrast of colors and textures.
Storage & Reheating Instructions
Store these cookies in an airtight container at room temperature for up to five days. To keep them soft, you can place a small piece of bread in the container to maintain moisture. If you need to store them longer, they can be frozen for up to three months. When freezing, place them in a single layer or use parchment paper between layers to protect the chocolate kisses. To enjoy a frozen cookie, let it thaw at room temperature for about an hour.
Memories Made Around the Table
I remember one specific Christmas Eve when my siblings and I stayed up late specifically to finish a batch of these cookies for a neighbor. The kitchen was warm, the radio was playing classic carols, and we were all covered in a fine dusting of green sugar. There is something so special about the way a simple cookie recipe can bring people together, creating a moment of peace and joy amidst the holiday rush. Every time I smell that peppermint and chocolate aroma, I am transported back to that cozy night in our childhood kitchen.
FAQs
How do I keep the chocolate kisses from melting and losing their shape?
The best way to prevent the kisses from melting into a puddle is to freeze them before you use them. Also, let the cookies cool for just one or two minutes before pressing the kiss in, rather than doing it the very second they come out of the oven. Once the kisses are on, do not move the cookies until the chocolate has fully re-solidified.
Can I make the dough in advance?
Yes, you can prepare the dough up to two days in advance. Keep it tightly wrapped in plastic wrap in the refrigerator. When you are ready to bake, let the dough sit at room temperature for about fifteen minutes so it is soft enough to roll into balls.
What if I cannot find mint swirl kisses?
If you cannot find the specific mint swirl variety, any chocolate candy kiss will work perfectly. You can also use a small peppermint patty or a chocolate thin. The peppermint extract in the cookie dough will still provide that signature holiday flavor even if the candy on top is plain chocolate.
Why did my cookies come out flat?
Cookies often spread too much if the butter was too melted rather than just softened, or if the dough was too warm. Make sure your butter is cool to the touch when you start. If you notice the first batch spreading too much, chill the remaining dough for twenty minutes before baking the next tray.
Are these cookies suitable for a cookie exchange?
These are excellent for cookie exchanges because they are sturdy once cooled and they have a very long shelf life. Their unique appearance also makes them stand out among more traditional cookies, and they pack easily into tins when layered with parchment paper.
Final Thoughts
Mint Chocolate Kiss Blossom Cookies are truly the essence of Christmas in a single bite. With their festive green shimmer and the perfect balance of chocolate and mint, they are sure to become a new favorite in your holiday rotation. Whether you are baking them for a gift, a party, or just a quiet night by the fire, I hope they bring a little extra magic to your season. Happy baking and merry Christmas.


Mint Chocolate Kiss Blossom Cookies
- Total Time: 30 minutes
Ingredients
- 1/2 cup unsalted butter, softened
- 3/4 cup granulated sugar
- 1 large egg
- 1 teaspoon alcohol-free vanilla extract
- 1/2 teaspoon peppermint extract
- 1 1/2 cups all-purpose flour
- 1/3 cup unsweetened cocoa powder
- 1/2 teaspoon baking soda
- 1/4 teaspoon salt
- 1/3 cup green sanding sugar, for rolling
- 24 mint chocolate swirl candy kisses, unwrapped
Instructions
- Start by preheating your oven to 350 degrees Fahrenheit. Line two large baking sheets with parchment paper or silicone mats to prevent the cookies from sticking. This ensures an even bake and makes cleanup much easier after your holiday baking session.
- In a large mixing bowl, beat the softened butter and granulated sugar together until the mixture is light and fluffy. This process usually takes about two to three minutes using an electric mixer. Creaming these ingredients properly is the key to a soft, melt in your mouth cookie texture.
- Beat in the egg, the alcohol-free vanilla extract, and the peppermint extract. Continue mixing until everything is well combined. The peppermint extract is quite strong, so measure carefully to ensure it does not overpower the chocolate.
- In a separate medium bowl, whisk together the all-purpose flour, cocoa powder, baking soda, and salt. Make sure there are no large clumps of cocoa powder, as this will ensure the flavor is evenly distributed throughout the dough.
- Gradually add the dry ingredients to the wet ingredients. Mix on low speed until the flour and cocoa are just incorporated. Be careful not to overmix the dough, as this can lead to a tougher cookie. The dough should be thick and slightly tacky.
- Scoop about one tablespoon of dough at a time and roll it into a ball, roughly one inch in diameter. Roll each ball in the green sanding sugar until it is completely coated. Place the balls on the prepared baking sheets, spacing them about two inches apart to allow for slight spreading.
- Bake the cookies for 8 to 10 minutes. You will know they are done when the edges are set and the tops have a slightly cracked appearance. Do not overbake them, as they will continue to firm up as they cool on the hot pan.
- Immediately after removing the cookies from the oven, gently press a mint chocolate swirl kiss into the center of each cookie. The heat from the cookie will slightly melt the bottom of the candy, helping it stick. Let the cookies sit on the baking sheet for five minutes before moving them to a wire rack to cool completely.
- Cook Time: 30 minutes
- Diet: Vegetarian